
Swimming Pool Excavation: Step 4
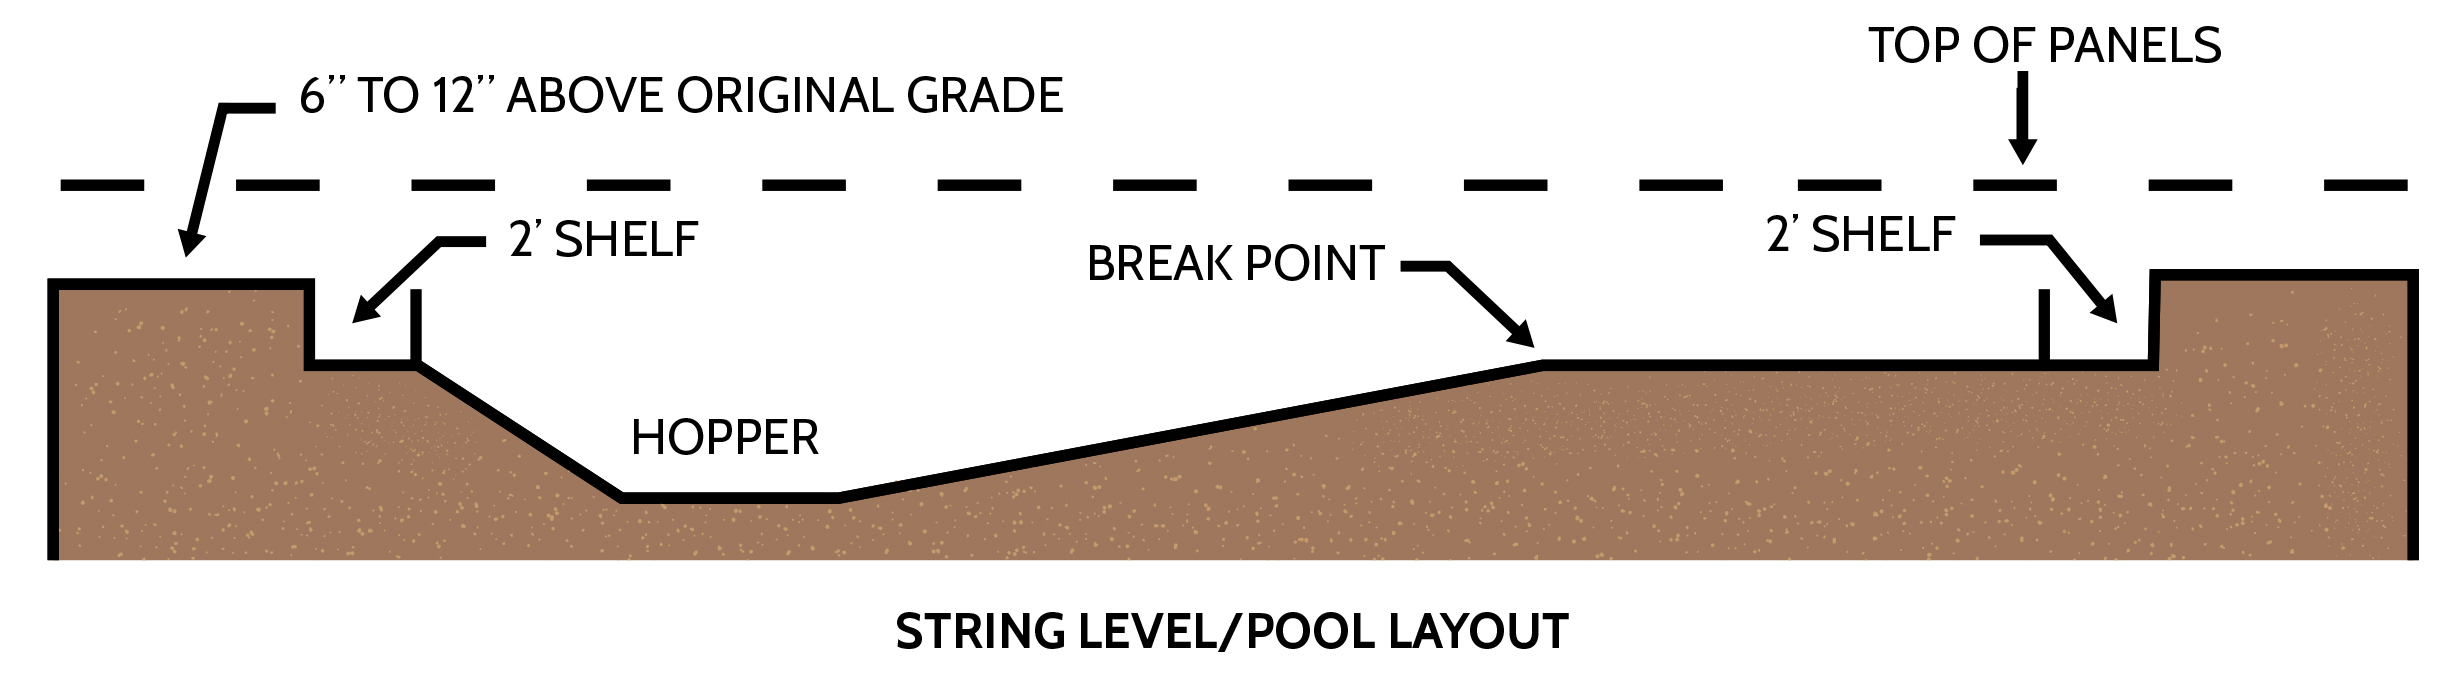
The elevation is a very important part of the pool layout. The pool should be 6-12” higher than the existing grade. You want drainage away from the pool but you also do not want drainage towards the house or other critical areas.
- The elevation of the pool will include the pool wall height and any copings that will be used on the pool. A 42” or 48” high pool wall with a 2 ⅜” coping will have a height of 50 ⅜” total height.
- When proper elevation is determined, place string lines to the layout stakes. This will enable you to have a consistent reference point (benchmark) when using your laser level or transit.
Note: You should reference an existing point on a house, deck or walkway to determine the elevation.
Excavation (aka The Dig) – CALL BEFORE YOU DIG FOR UTILITIES
Note: Your yard will become a building site at this point and you will have a big hole in the ground with piles of dirt in the yard.
- Confirm all the dimensions that have been used for layout.
- Confirm that you have contacted all necessary companies for obstructions and utilities. Also, make sure local building codes have been met prior to excavation.
- Review ALL manufacturer layouts and dig specifications.
- Excavation will always be 2” deeper than manufacturers layout sheets; the extra 2” is for installation of the pool base material.

There are many ways to excavate a pool and the excavation may vary on machinery, area and operator preference.
Note: It is best to have a few people to aid in the excavation. One person can assist the operator with depth and shape of the pool dig. Also, use marker paint to highlight slopes and transition lines for the operator. The better the excavation the less work you have later!

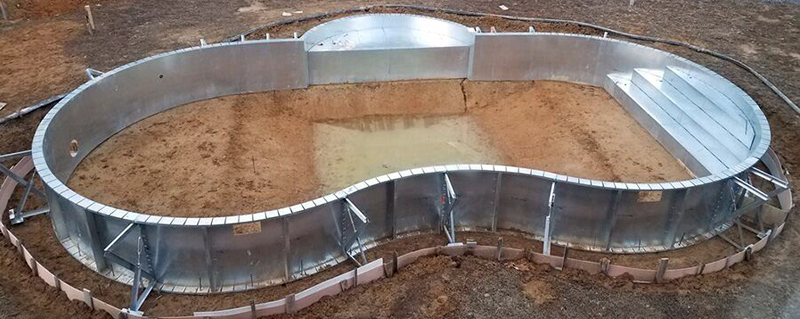
The Shelf
The Shelf is the part of the excavation that you will place the panels and braces on and it will be the point at which the initial elevation is determined. The shelf is excavated to the wall height and coping height from the string line or benchmark point. NOTE: the shelf must be on undisturbed soil.
- Do not dig the shelf deeper than needed.
- The shelf point is also the excavation depth for the shallow end; you will have 2” of base material before liner installation.
Shallow End
- Use the benchmark or the string line as a guide for the shallow end depth. The bottom of the dig will be the start of the shelf.
- When the shallow end is completed, mark the transition line or line from shallow to deeper. Also, drive stakes at the transition point at the correct width of the pool. These stakes will be later used to “string” the bottom for final dimensions.

Note: The stakes will be used for two reasons, one being the position of the walls during the wall assembly process. The stakes will also enable you to “string” the bottom of the pool for the base material installation.
Hopper or Deep End
Note: The excavated depth will be 2” deeper than the finished depth. You will have 2” of base material on the excavated soil.
- Draw out the hopper or deep end area with marker paint; this will assist the excavator with the dig. Having someone inside the pool area working with the excavator would be a great help, but that person must be careful!
- A typical slope for a diving pool is 14’ long. The length is measured from the shallow end transition line to the transition line at the beginning of the flat deep end.
Note: A pool that has a 14’ slope becomes narrower as it is dug towards the bottom of the pool. For every 42” or 3’6” of slope length, the slope becomes 12” or 1’ deeper on each side.

- Mark the flat hopper bottom with marker paint, refers to the dig specifications provided by the liner manufacturer for this information. Have the operator dig the hopper.
- After the hopper is complete, begin to excavate the sides and back slopes in accordance with the liner manufacturer’s specs. The liner manufacturer specs will be two inches less than excavated specs.
- When the pool is completely excavated, drive stakes at all transition points.
Note: The proper layout is important in that the skimmers and returns should be in the correct position in order to have proper circulation. The skimmer should be in line with the prevailing wind and the returns should be positioned so that movement of the debris on the surface is towards the skimmers. The skimmers, returns, and lights are typically precut. A general rule of thumb; one skimmer per 400 square feet of surface area.
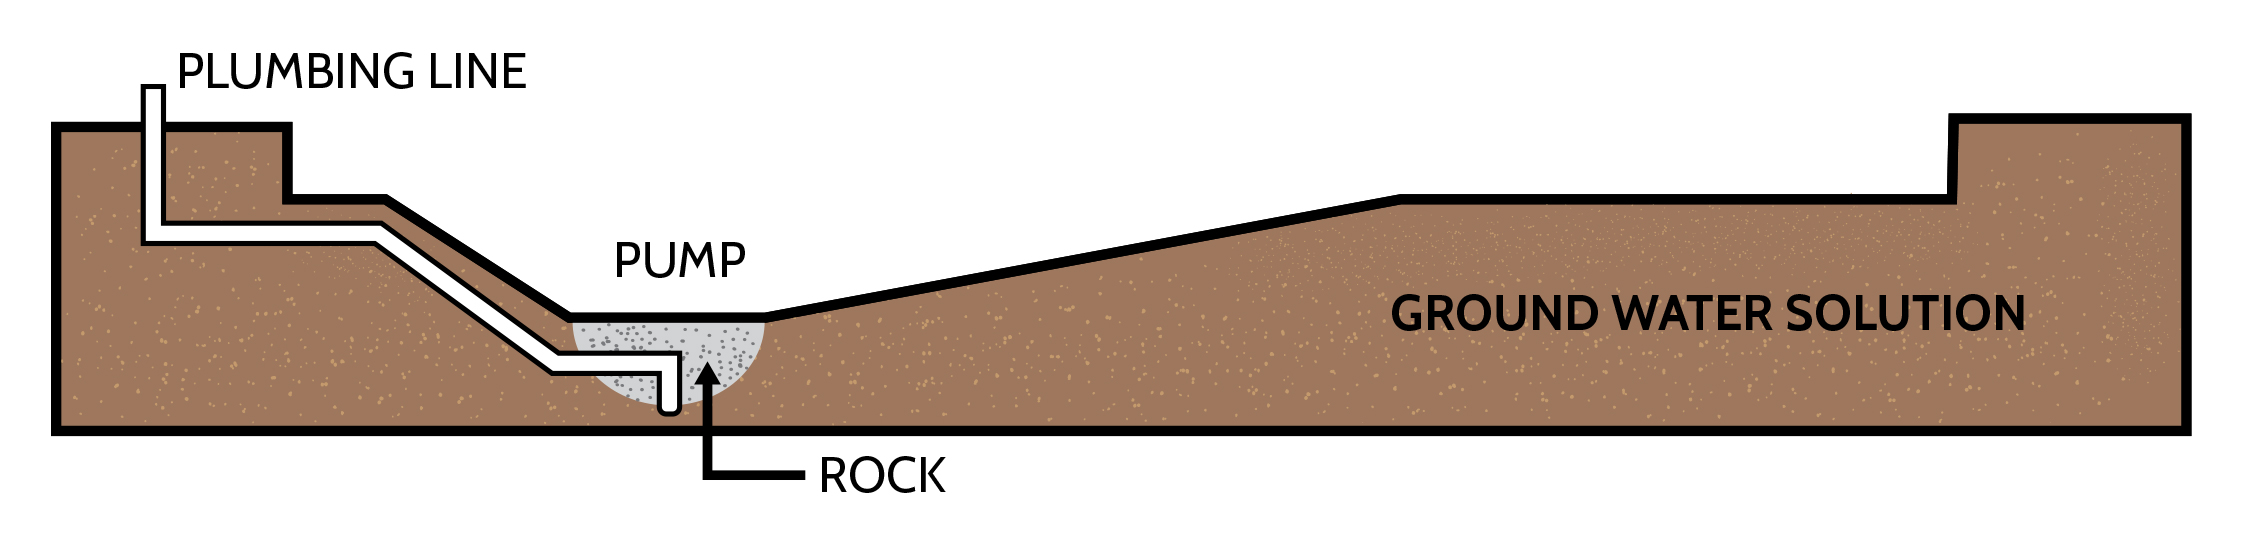
Ground Water Conditions
Groundwater is the term used for the water table. If you should encounter groundwater while digging the hopper, don’t panic.
Just follow these simple recommendations:
- Over dig just the bottom of the hopper by 1′ or 2′.
- Use a pea-sized rock to bring the hopper back to grade.
- Set a foot valve, available at a plumbing supply store, in the pea stone and plumb it to outside of the pool.
- Run a plumbing line from the hopper to near the filter.
- Hook the foot valve to a pump and keep the pump running continuously until the liner has been dropped and the pool is full of water.
- When swimming pool excavation and installation is complete, cap the plumbing line, leaving it available for use in the future, should the liner need to be replaced.
All Images & Content © PoolWarehouse.com
Swimming Pool Excavation Questions?
If you have questions about the Swimming Pool Excavation process please feel free to give us a call at 1-800-515-1747 or send us an email, [email protected].
At Pool Warehouse, We Know Swimming Pool Kits!


 What are our customers saying?
