Step 5: Pool Kit Wall Installation
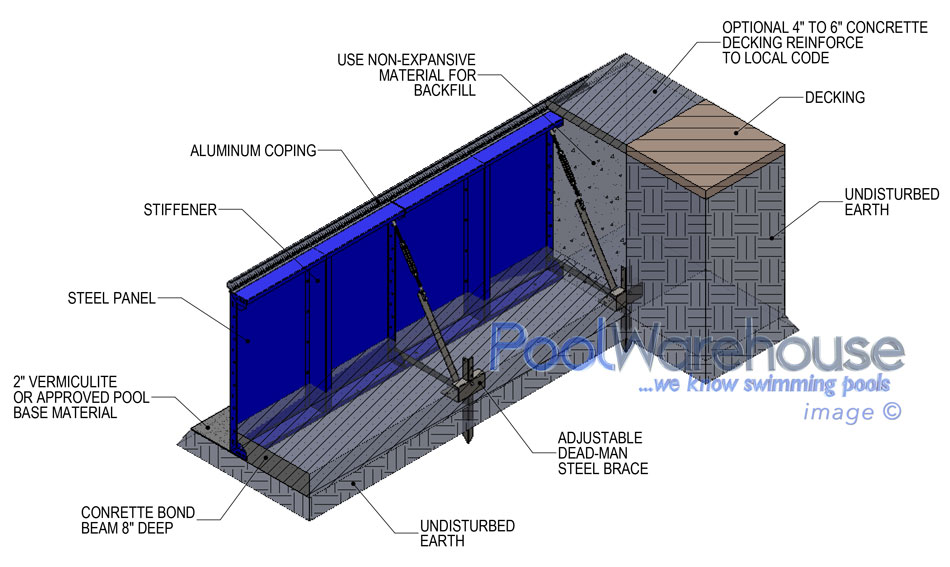
Note: For safety, wear gloves when handling steel panels and components. Start by laying out all panels on the panel shelf. Position a brace and necessary bolts (depending on the brand of the panel) at every panel joint, as indicated in the Pool Layout and Dig Dimension Drawing supplied to you.
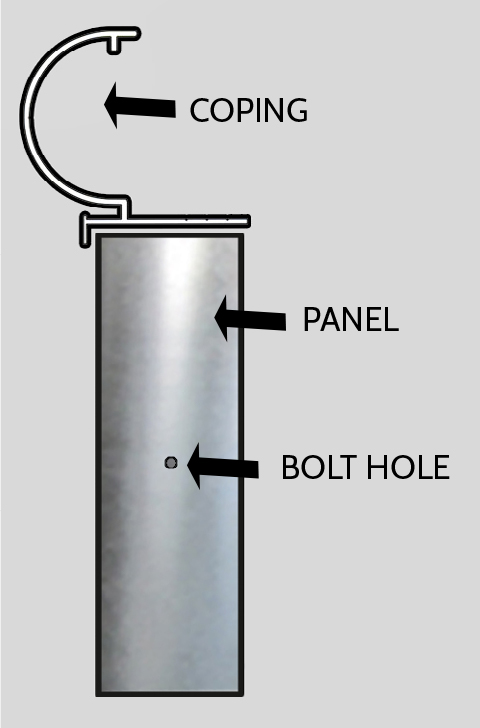
 Panel Installation
Starting in the appropriate place for the shape of the pool being built, fasten panels and braces together using the supplied bolts. Align the panel joints for a tight fit and hand-tighten (snug) the supplied non-corrosive bolts. DO NOT OVER-TIGHTEN!
Panels are available with precut holes for most commonly used skimmers. Position the skimmer panel according to the following guidelines:
- Locate the skimmer as per supplied drawing.
- Ensure the skimmer panel will be clear of the wall-mounted safety-rope anchors.
- Locate returns on walls around the pool to push surface debris in a circular motion towards the skimmer.
- Aqua Genies do not require additional returns, see the Aqua Genie Manual.
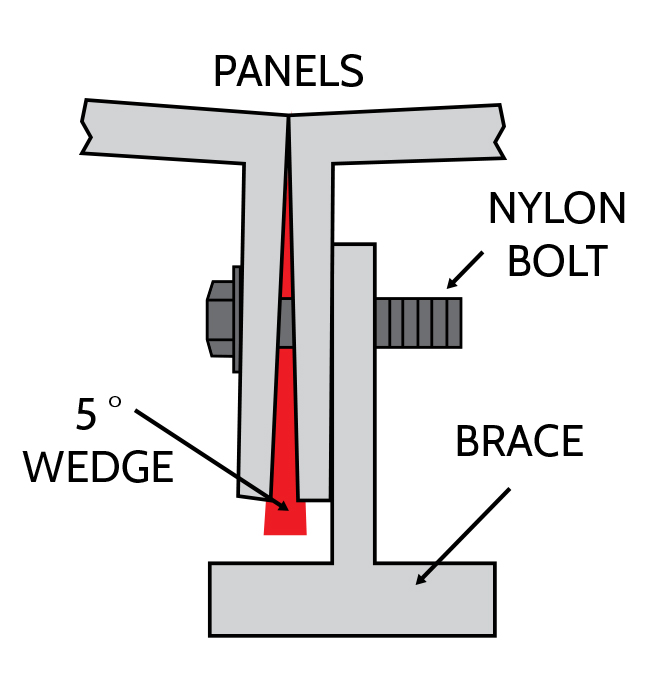
5° Wedge
The 5° wedge is used to change the radius of the pre-molded polymer panel. Loosely fit the brace to the panels and slide the wedge between the brace and the bolt. You will tighten the bolts later after the full radius is set.

Pool Wall Brace Assembly

Step Installation
- Start at the step area. Place the step in the area in which the excavator dug the step area. Have steps self-supported at that point.
- You can attach a panel to each side of the step with “C” clamps, do not permanently attach it at this point.
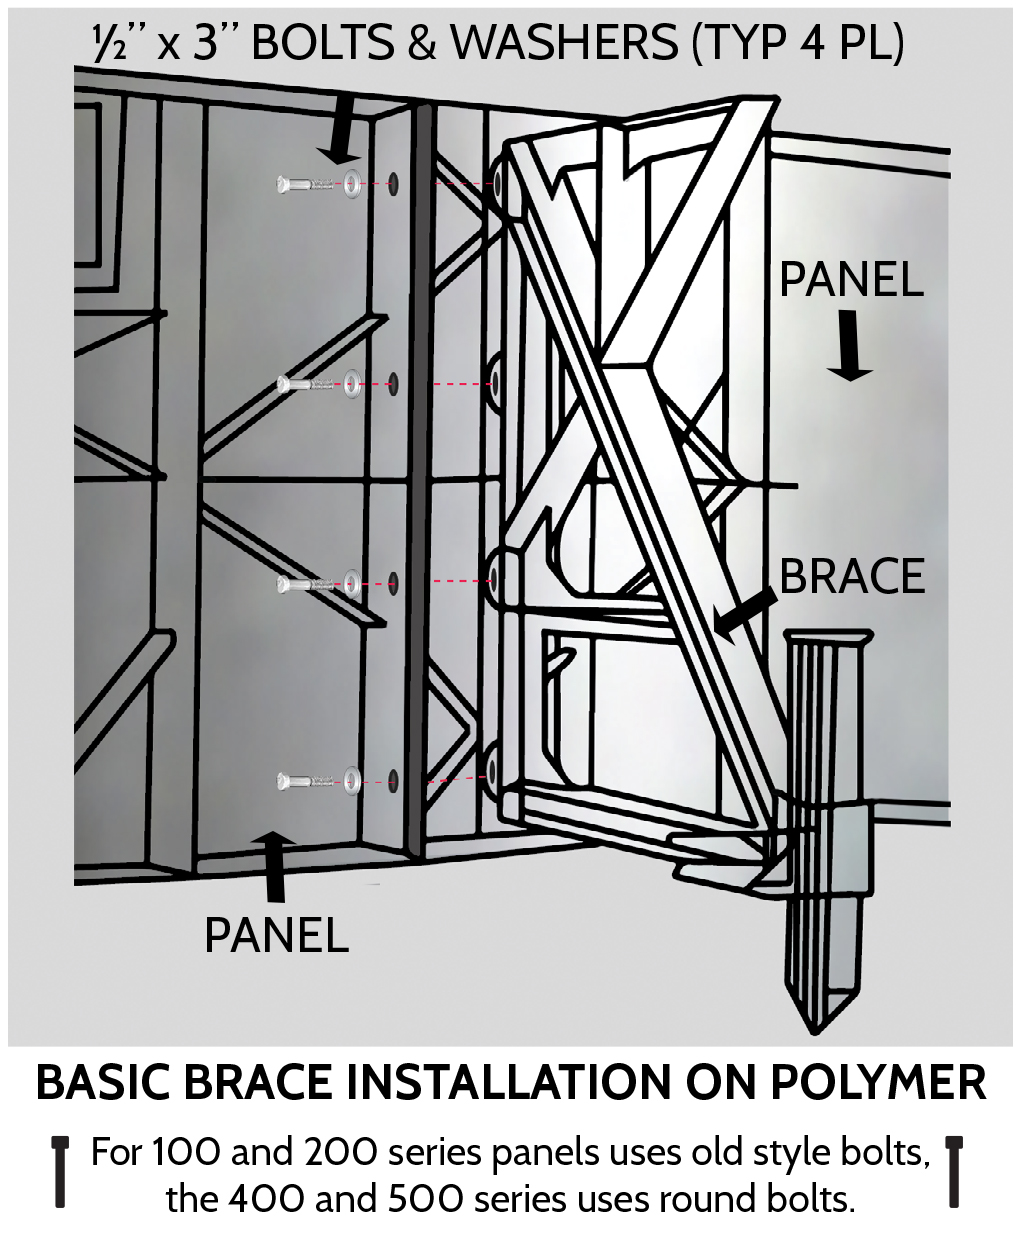
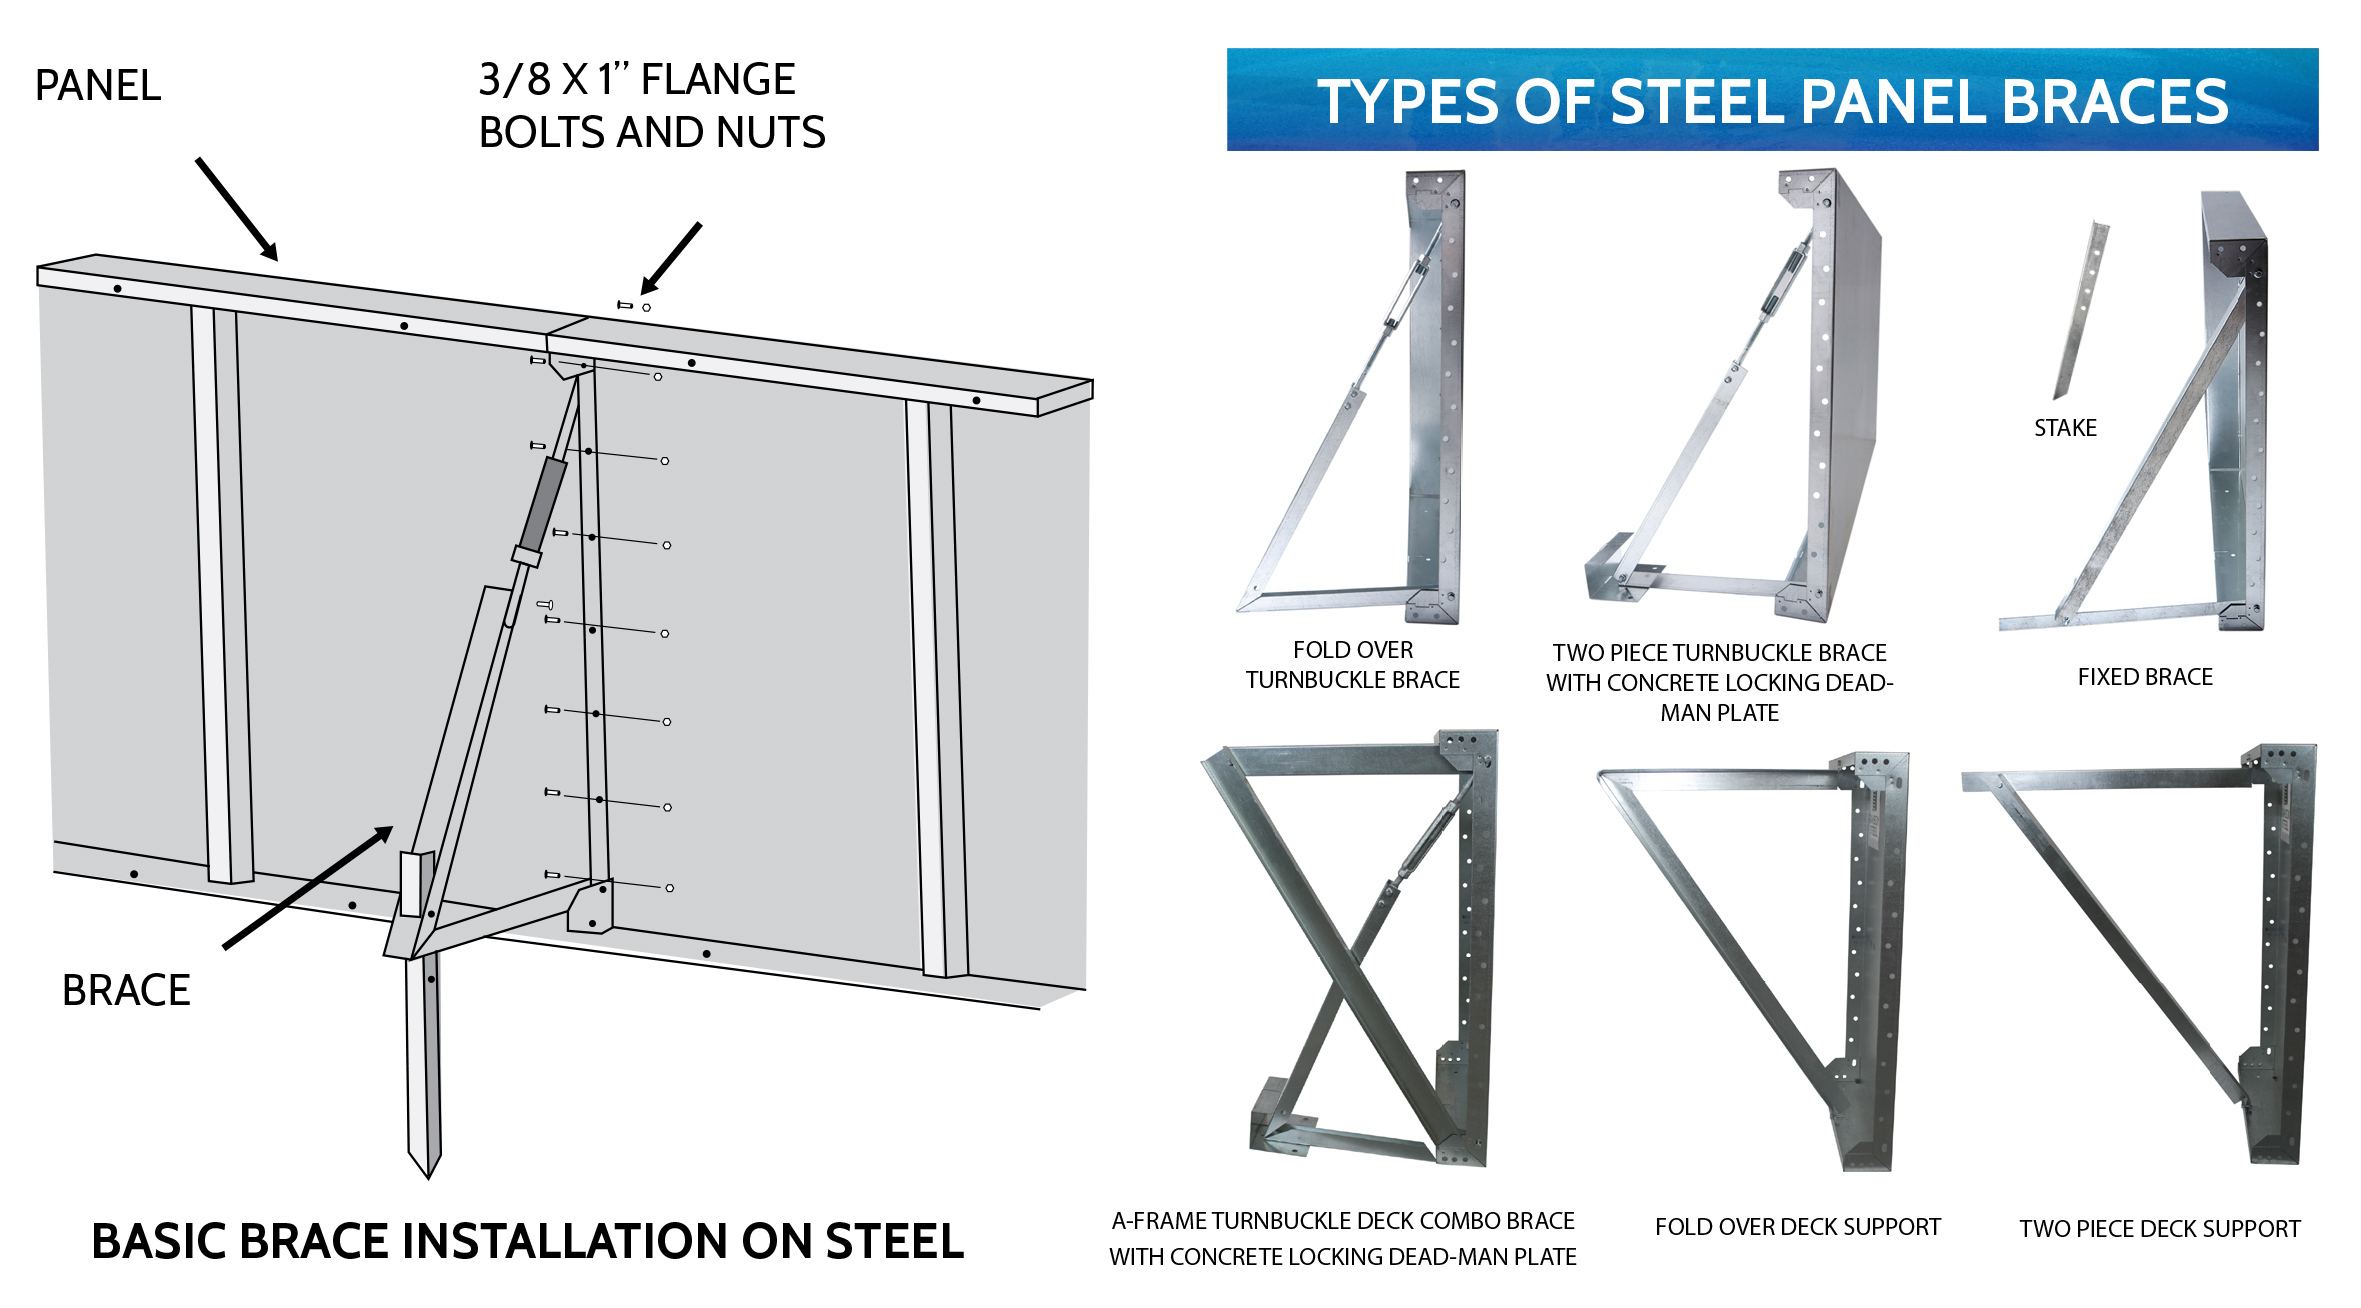
- Install next panel to one of the panels temporally attached to step. Use the fasteners provided with the pool walls. (Polymer and Steel Walls use different types of fasteners.) Steel nuts and bolts, nylon nuts or bolts and wedge systems are the most common.
Sweetwater Pool Kit Step or Swim Out/Cozy Cove Installation
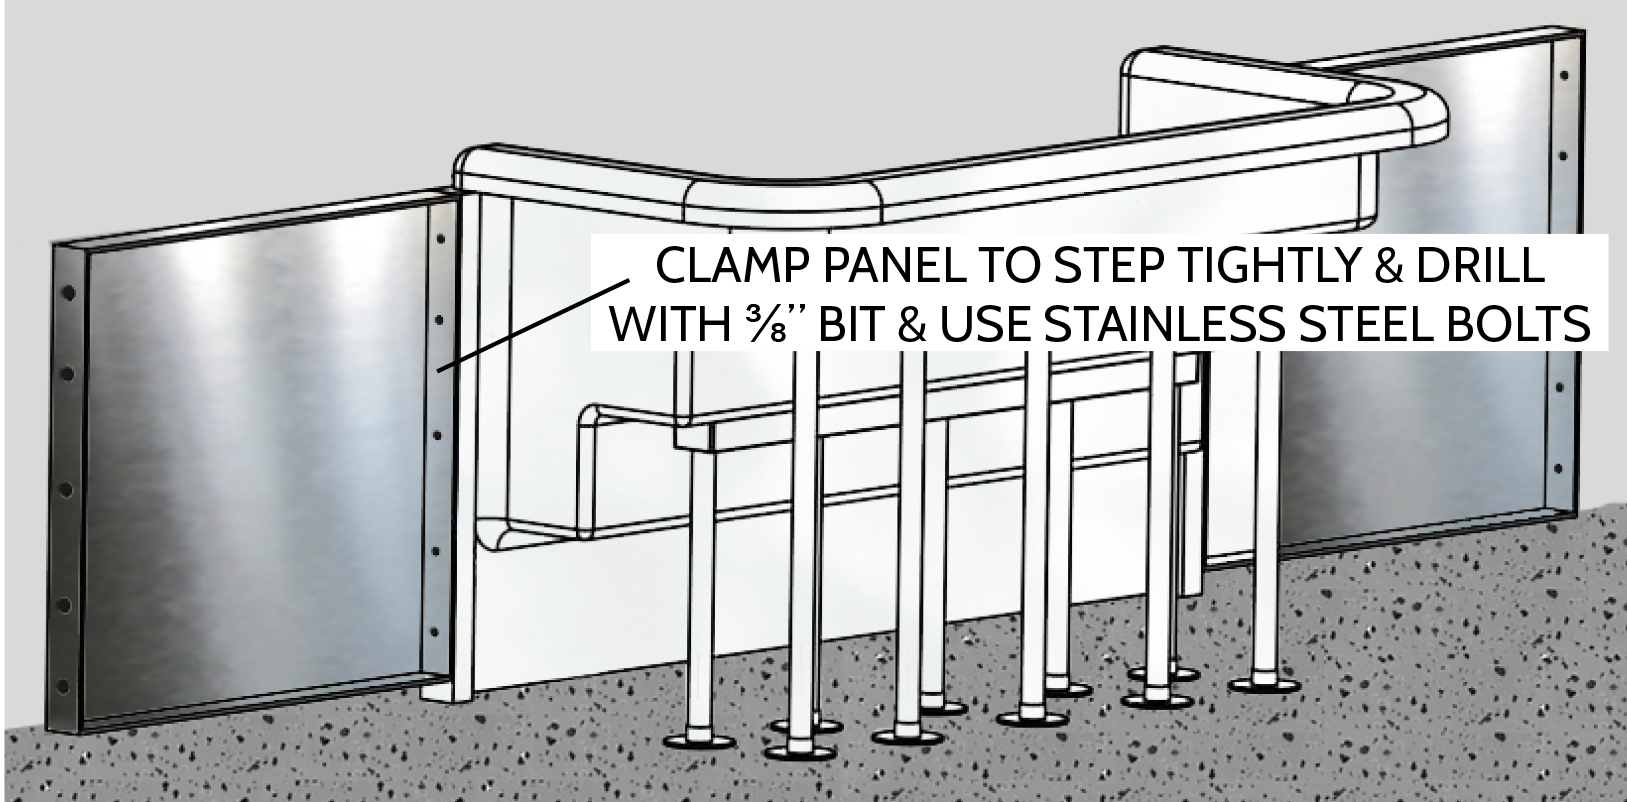
Steps and swim-outs are installed in the same manner. Start by setting the step in the excavated area according to the Pool Layout and Dig Dimension Drawing. Use supplied step support system. With the step in place, clamp the neighboring pool panel to the step, ensuring that the face of the step is flush with the panel and that the top of the panel is flush with the bottom of the step coping-receptor nose.
With the panel and step clamped tightly together, drill 3/8” holes through the panel holes into the step flange. Use stainless-steel bolts to secure the panels/braces to the step.
Squaring the Pool
 When the panels are fastened together, it is time to align the step and walls together.
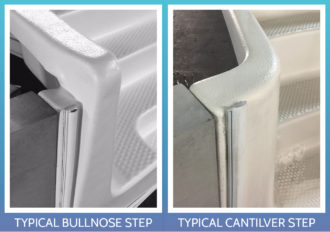
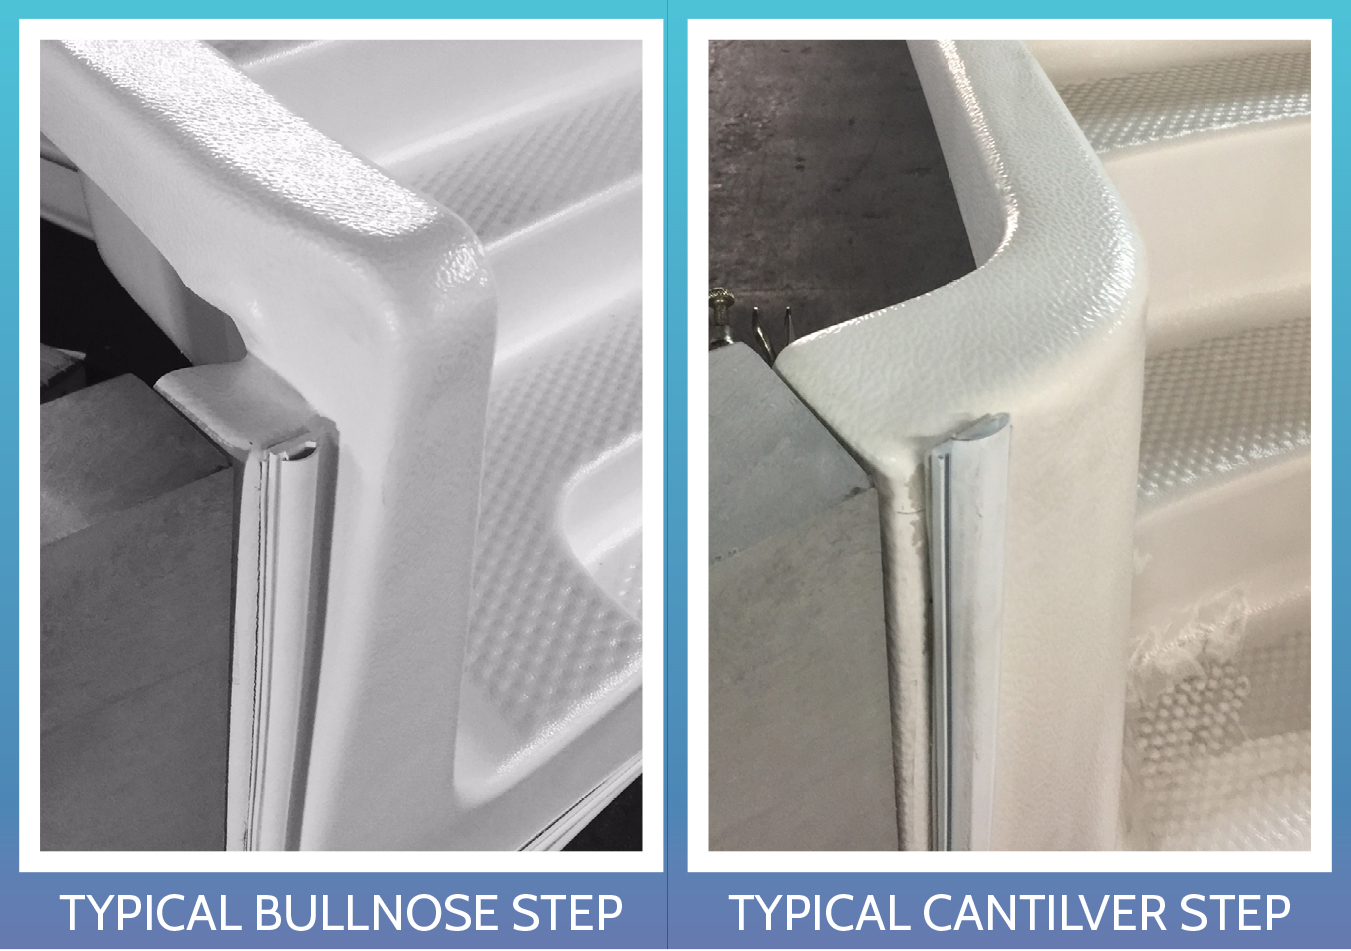
- Assure that the face of the panels and the face of the step are flush (refer to the image of Cantilever and Bullnose Step to Panel).
- When the correct height and the panels and steps are all flush, re-clamp the steps to the panels.
- Visually RECHECK the step and panel positions.
- When you are satisfied with step and panel positions, you will be ready to permanently attach the step to the panels using nuts and bolts.
- With the step and panels tightly clamped together, drill 3/8” holes through the side flange of the panel and step.
- Bolt the step to the panels.
- Check the square of the pool; check the diagonals of the pool walls. These measurements are provided on your drawings.
- Check the width at various points along the walls.
- Check overall length of the pool.
Leveling the Pool
- Using the laser transit, check the level around the pool.
- Determine the high point.
- The high point will become your level benchmark.
- At points that are lower, you can use patio blocks of various thickness as shims.
Note: Roof shingles can be used alone or in small layers in conjunction with the patio blocks to better fine-tune the level.
- RECHECK level
- The coping can have slight gaps between the butt joints, a coping clip will be provided to cover joints.
Note: INSTALL ALL SAFETY LABELS TO THE COPING. LABELS ARE PROVIDED WITH COPING AND LINERS.
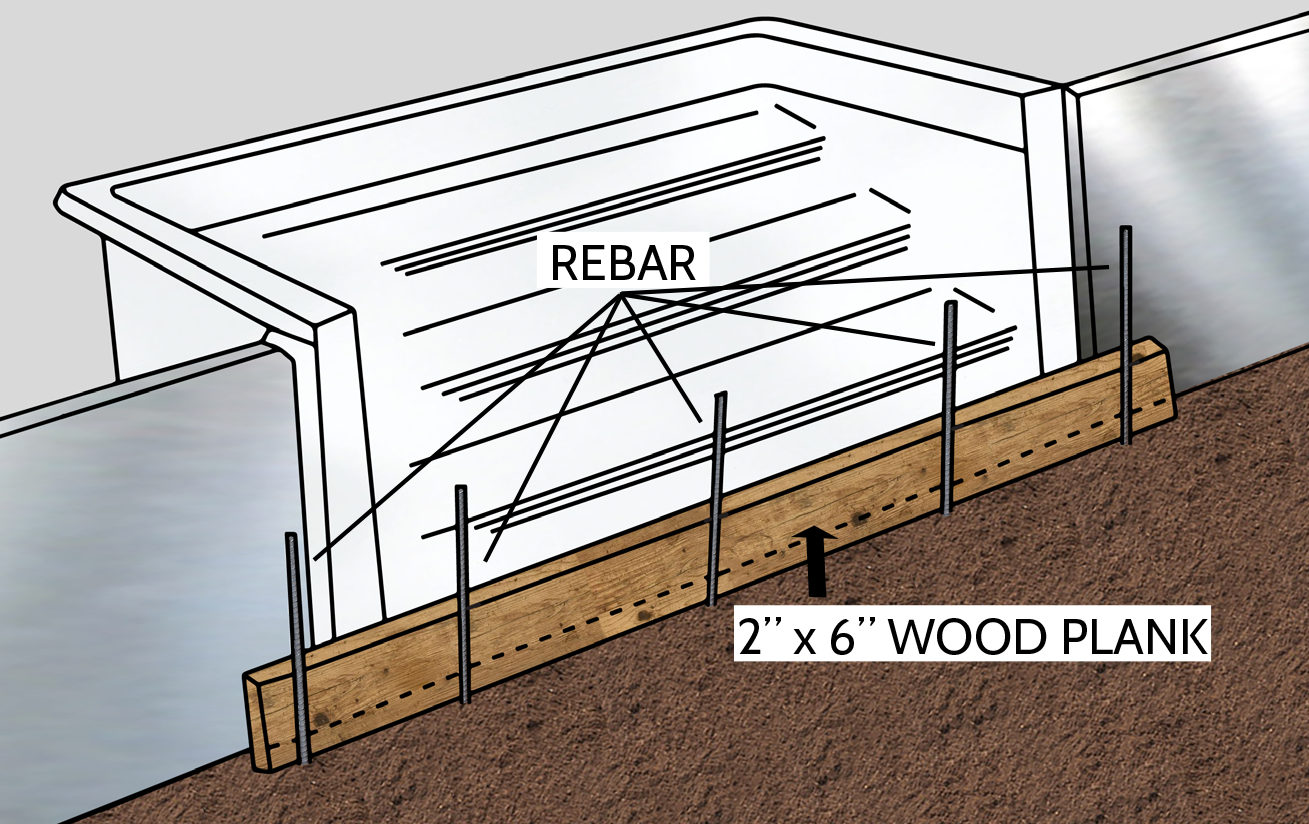
Securing the Step
- Place a 2” x 6” piece of wood that is longer than the step is wide in front of the step.
- Secure the wood in place by driving rebar in front of the step, this will keep the step from moving when the concrete collar is poured.
Rough Plumbing
At this point, you will want to install the plumbing fittings.
CHECK LOCAL AND STATE CODES FOR PROPER EQUIPMENT AND APPROVED FITTINGS
Installing Coping
- Prior to installing coping, run strings the length of all walls at the top of the panels (this will be used as proof that the walls are straight).
- Coping is used as a perimeter or edging of the pool and also to hold the liner in place.
- Start with a corner piece, aligning the center of the coping to the center point of the panel.
- Secure the coping to the panel using the self-tapping screws provided with the coping at a maximum of 12” apart.
- Next, install straight coping with 1/4” gap at the joints of the straight and radius coping.

Finally, Check Your Swimming Pool Kit Walls & Braces
Once all pool kit wall panels, braces, and steps have been bolted together and the aluminum coping has been secured to the panels, it’s time for one final check. A few extra minutes spent verifying the shape of the pool at this stage of completion will lead to a proper swimming pool liner fit and ultimately a job well done.
- Check diagonal measurements across the pool, at both the top and bottom of the panels, and verify that they are the same.
- Level all pool kit wall panels, using patio block or bricks at the panel joints, so that the top of the panel is level with the benchmark set at the start of construction.
- Check all pool wall panels for vertical alignment using a carpenter’s level on the face of the panel.
- Check all straight walls for horizontal alignment. To do this, stretch a string the entire length for each straight wall, at the top of the panels, ensuring that each panel lines up with the string.
All Images & Content © PoolWarehouse.com

Swimming Pool Kit Wall Installation?
If you have questions about the inground swimming Pool Kit Wall Installation process please feel free to give us a call at 1-800-515-1747 or send us an email, [email protected].
At Pool Warehouse, We Know Swimming Pool Kits!

