Winterizing Your Aqua Genie
We recommend using the patented Aqua Genie Winter Cover to winterize your Aqua Genie skimmer.
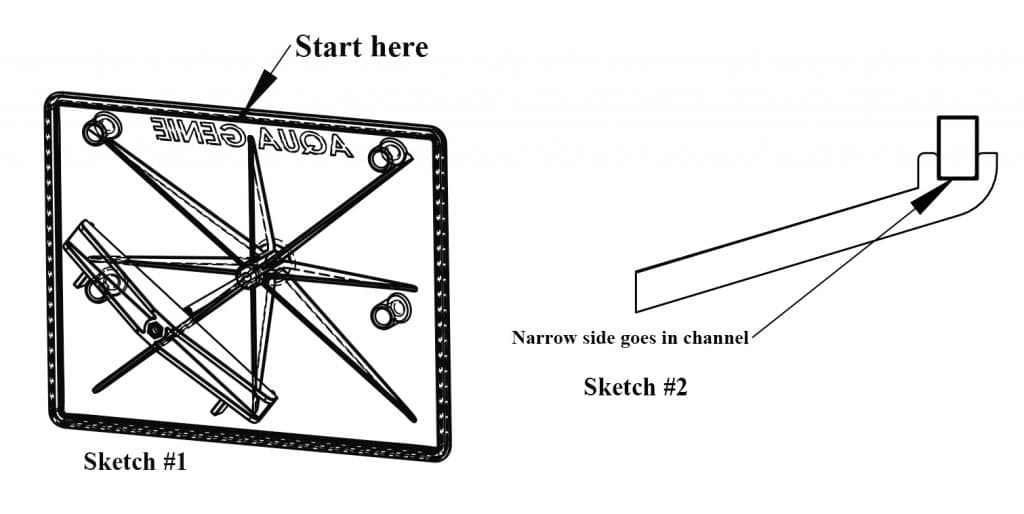
Installing Winter Cover Gasket
To install gasket
- Start at the top center of the gasket channel. (See Sketch#1)
- The gasket is installed with the narrow side of the gasket installed in the channel. (See Sketch #2)
- Work gasket into channel making sure is well seated.
Assemble Winter Cover
Place threaded rod through the hole in winter cover, assemble in the correct order. (See Sketch#3)
Note: O Ring goes between Knob and cover.
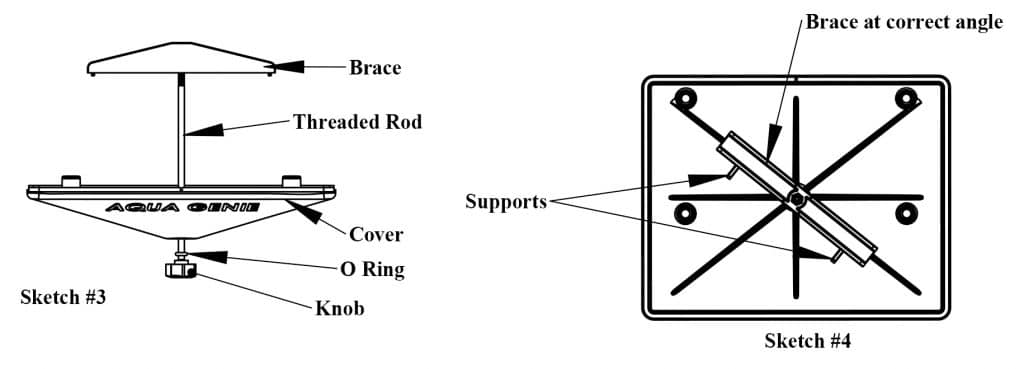
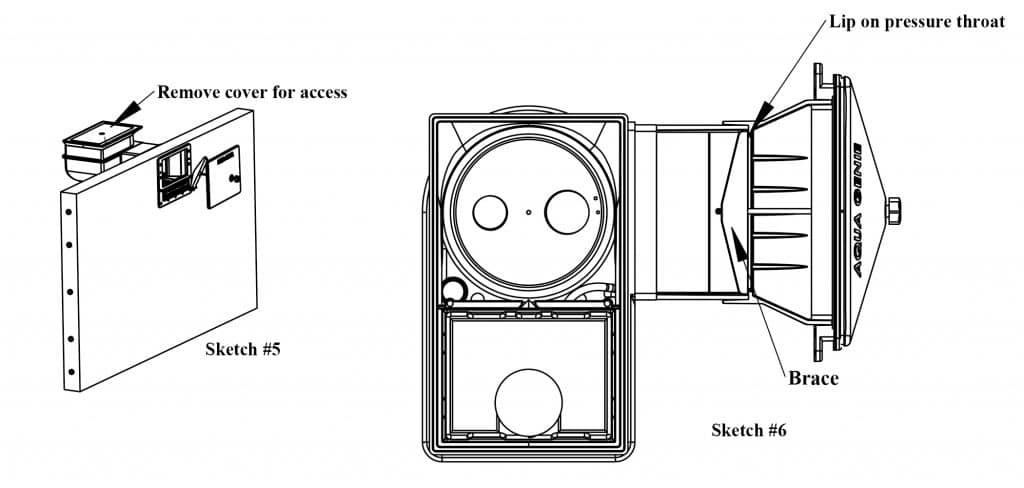
Installing Winter Cover
- Remove Aqua Genie Cover to gain access for installation. (See Sketch #5)
- Orient brace from top to bottom corner of cover, with supports facing down. (See Sketch #4)
- Guide the assembled Winter Cover through Weir opening (you do not have to remove weir assembly) (See Sketch #5). Brace goes
behind lip in pressure throat - Hold the cover against the faceplate with one hand and rotate the brace until it is horizontal
- Turn knob by hand until gaskets seats on the faceplate. The brace will tighten against the lip on pressure throat. (See Sketch#6) (Caution: over-tightening will distort the gasket)
- Drain the water in basket well and follow pump and filter manufacturer’s winterizing recommendations.
Winterizing Your Aqua Genie
Have Questions?
If you have questions about the Aqua Genie Winter Cover please feel free to give us a call at 1-800-515-1747 or send us an email, [email protected].
At Pool Warehouse, We Know Swimming Inground Pool Kits!

